Let me show you how it's done.

Let me show you how it's done.
Every child is an artist. The problem is how to remain an artist once we grow up. ~Pablo Picasso
Showing posts with label art teacher. Show all posts

Monday, October 24, 2011

Step 1: Background


Getting that radial gradient down! the background is usually a "race against time" and an upper body workout. With acrylic paint, you can't work with it if it's dry so, when blending and creating a gradient, you need the paint to stay wet. Sometimes, I will use a paint retarder but sometimes I just stick with a good amount of paint and water. Don't use too much water or then, you'll have to wait longer for it to dry and possibly use more layers. It usually takes me 2-3 layers of the same thing to make it solid (when it comes to the background).

Step 2: reference, hands


The white has been set down for the color of the hands. that means that I had to paint the shape of where the hands are going, white. the white is used to refer back to canvas so we can build solid colors, on top.

Step 5: Color and shading


On this hand, after the darkest parts have been painted, I went back and created gradients with lighter colors. There's a lot of "back and forth" in the painting process (with acrylics).

Step 7: Shading and details


I'm going by color. the darker I get, the closer to final details I get. After the darks get figured out, it's easier to see where your finishing highlights will go.

Step 8: the sconce


I didn't have any reference for the sconce. This was a situation to where you know where the light is coming from and depending on the shape of the object, you use what you know as to how it will be shaded and highlighted.

Step 10: finished hands


After the flame on the candle has been done, we can call the hands done (for now). I'll add that the way to achieve a glow for the flame is use of a gradient using only white paint.

Step 11: reference(s)


A lot of the time, things will never be perfect. In order to get the zombie female exactly how I wanted in my head, I needed to look at 3 images for reference all at the same time to create what I visioned. I had to take some shots of my friend, a shot of my hand against the wall, and a shot of another woman, in costume.

Step 14: finishing touches


It's the drips under the circular frame that wrapped this up for me (for the time being).

Step 15: wall ready


I'm going to admit... This wan't the finished product. I added some layers of resin, a thick pour-on gloss. I felt like it "had to be done" for the art show. Don't worry, I'll post up the image from the Zombie Art Show on Halloween. As far as finishing goes.... it is a challenge when to really call something "finished". In this case, this could have been finished....

Friday, September 9, 2011

Step 1: Background, part 1


The general color of the gradient fade of the logs are used. Here, there are 3 layers of this strategy applied to get a good, solid layer. The object is to get rid of loose, painterly brush strokes.

Step 2: Background, part 2


This section can easily be compared to mapping and drawing. I'm actually eyeballing even space. A very precise way of doing this would be to measure the space evenly. I did use a ruler to give me straight lines.

Step 3: Background, part 3


The lighter colors, the highlights, help give a relief. Relief is used in this way to mean, height or suspension. It is a term mostly used in sculpting. Different thicknesses and transparencies are used to create this look.

Step 4: Drawing


A smaller round brush was used to make out the proportions and dimensions of the head. Painting and drawing go hand in hand.

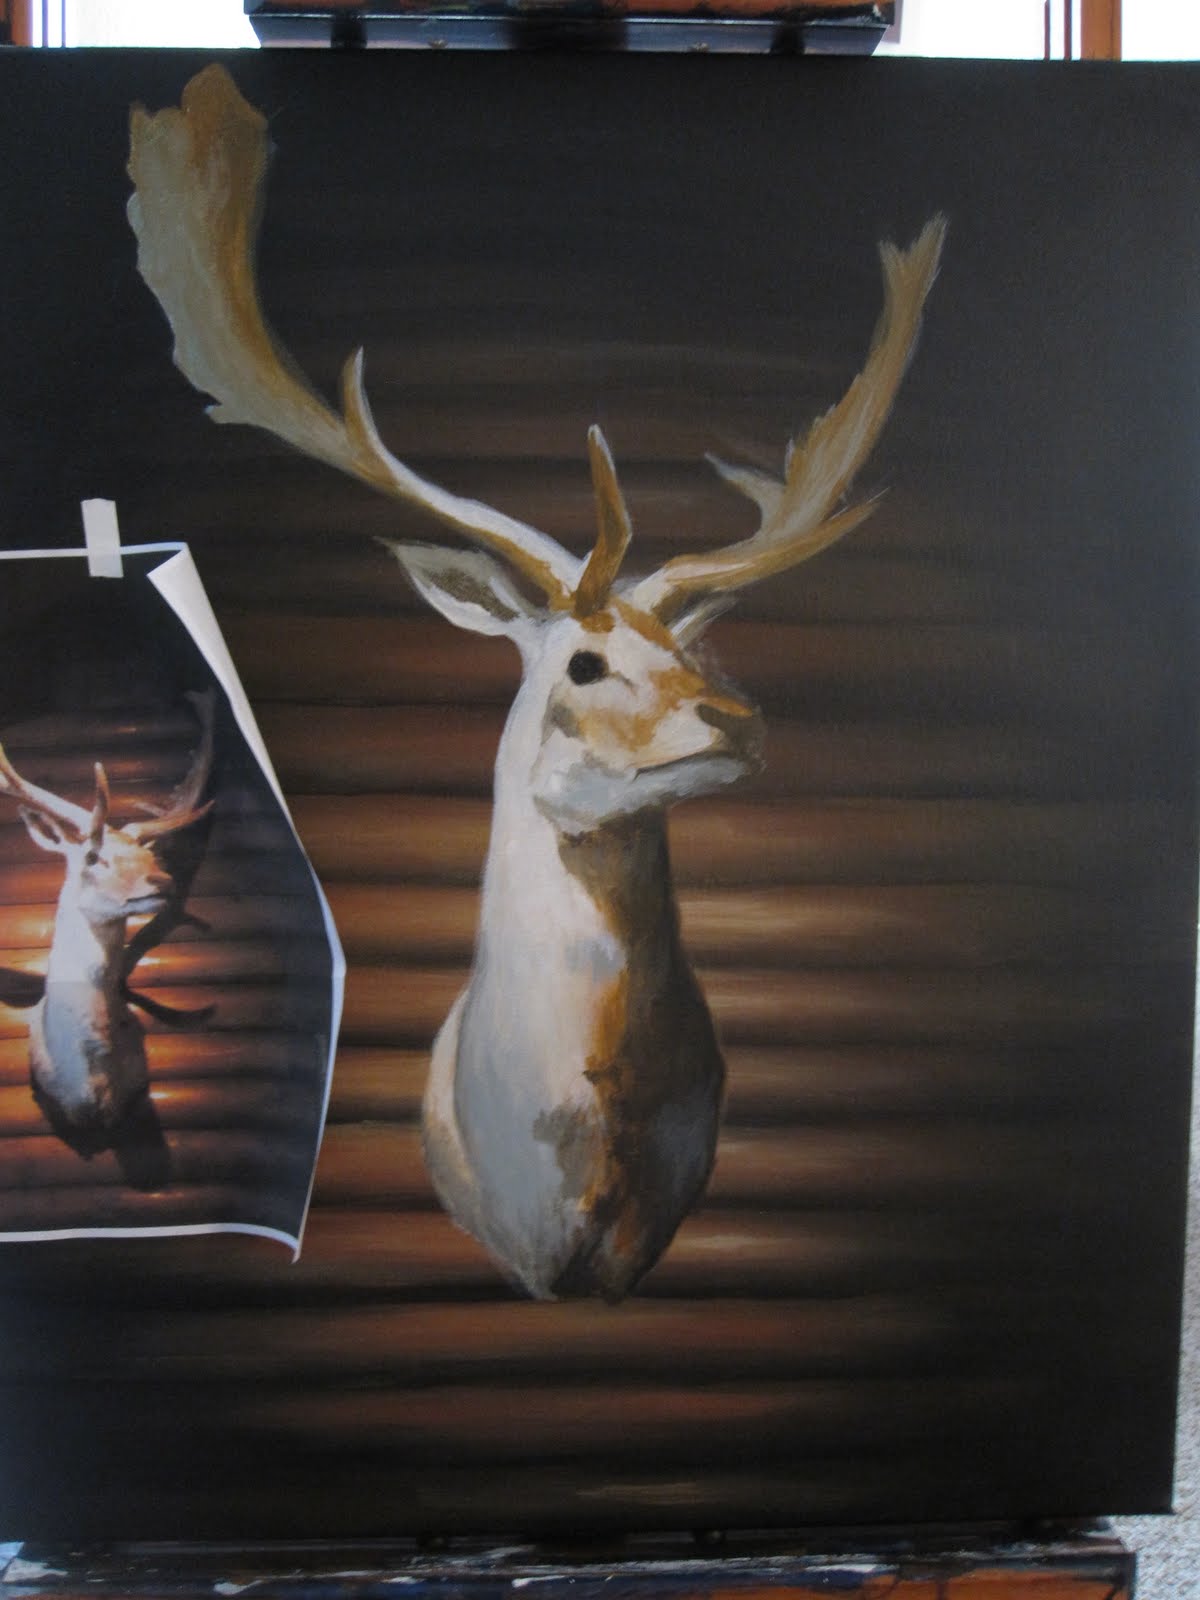
Step 5: White


So, now we are reverting back to canvas, creating a "new" canvas. Anytime white is applied, it's considered reverting back to canvas. This is another time as well where drawing comes into play. It takes a good, keen eye to capture form and shape. The type of brush you use also plays a role in the shape of the strokes. I usually like to use square tips for filling in and round for everything else, like drawing.

Step 6: Color


Not too much color is needed given the reference but, there are several shades of brown, earth tones, are a key element in making this 3-dimensional. Note how the blending is different on the horns versus the hair.

Step 7: Shading and details


You can see that the horns have been enhanced with fleshy shading. When you shade, the color doesn't have to always be a shade of black. As long as the value of the over-all color is darker. The general shape of the eye has been added also.

Step 8: Finishing the Head


Small little details have been aded to finish up the head. The eyes received a glimmer, using the smallest amount of white paint. Blue has been added to the body and the horns as a reflected, cooler light, opposite of all the warm colors we see. The nose has been added to and then, the finishing touch was the Shadow being casted on the wall, using a very watered down black. Solid black wouldn't work. Even as a shadow, we should still be able to see what the shadow is being casted on.

Step 9: The Hands, part 1


The hands are done in white, first. Here, we get the proportion and the basic shape.

Step 10: The Hands, part 2


This is where we overlap the white with a base skin color. Since the white is down, we can paint this layer as if it's on fresh canvas. Starting with a base color and letting it dry before applying the shading and highlighting works best for me. That base color will be used again to create gradients.

Tuesday, August 16, 2011

Step 1: White


After the background is done, White paint is applied, in order to refer back to canvas and to make the other colors on top solid.